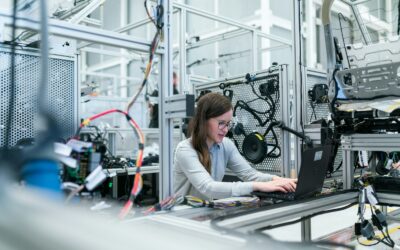


Introduction
Keeping your computer clean is essential for its optimal performance and longevity. Dust, dirt, and grime can accumulate over time and affect the performance of your computer, causing it to slow down or even overheat. In this guide, we will provide step-by-step instructions on how to clean a computer for beginners.
Gather the Necessary Supplies
Before you begin cleaning your computer, it is important to gather all the necessary supplies. Here’s what you’ll need:
- Clean, lint-free cloths
- Cotton swabs
- Isopropyl alcohol
- Compressed air canister
- Soft brush
Power Off and Unplug
Before you start cleaning, make sure to power off your computer and unplug it from the electrical outlet. This will prevent any accidental damage and ensure your safety during the cleaning process.
Cleaning the Exterior
Start by cleaning the exterior of your computer. Use a clean, lint-free cloth to wipe down the surfaces, including the monitor, keyboard, and mouse. If there are any stubborn stains or marks, dampen the cloth with a small amount of isopropyl alcohol and gently wipe the affected areas.
Cleaning the Keyboard
The keyboard is one of the most commonly used components of a computer and can accumulate a lot of dirt and debris over time. To clean the keyboard, start by turning it upside down and gently tapping it to dislodge any loose debris. Use a can of compressed air to blow away any remaining dust or dirt between the keys. If there are any sticky or stubborn stains, dip a cotton swab in isopropyl alcohol and gently clean the affected areas.
Cleaning the Monitor
To clean the monitor, first, make sure it is turned off and cool to the touch. Use a soft, lint-free cloth to gently wipe the screen in a circular motion. Avoid using harsh chemicals or abrasive materials as they can damage the screen. If there are any stubborn smudges or fingerprints, dampen the cloth with a small amount of water and gently wipe the affected areas. Dry the screen with a clean cloth afterwards.
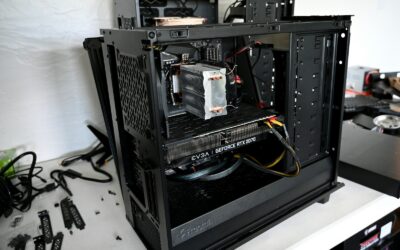
Cleaning the Inside
Now it’s time to clean the inside of your computer. This step requires caution and should only be done if you are comfortable working with computer hardware. If you are unsure, it is best to seek professional help.
Start by removing the side panel of your computer case. Use a can of compressed air to blow away any dust or debris from the internal components, such as the motherboard, fans, and power supply. Be careful not to touch any of the components with your hands or the nozzle of the compressed air canister.
If there are any stubborn dust or dirt build-ups, you can use a soft brush to gently remove them. Be gentle and avoid applying too much pressure as this can cause damage to the delicate components.
Once you have finished cleaning the inside of your computer, carefully put the side panel back on and secure it in place.
Final Steps
After cleaning the inside of your computer, it is important to give it some time to cool down before turning it back on. Once it has cooled down, you can plug it back into the electrical outlet and power it on.
It is also a good idea to regularly clean your computer on a schedule to prevent excessive dust build-up. Depending on your environment, it is recommended to clean your computer every 3-6 months.
Conclusion
Cleaning your computer is a simple yet important task that can help improve its performance and extend its lifespan. By following the steps outlined in this guide, even beginners can keep their computers clean and running smoothly. Remember to always exercise caution when working with computer hardware and seek professional help if needed.